Why This Is Important
Conserving energy is critical with an uncertain electricity and fuel supply. Equally critical is cooking safely. Practice to know what works indoors or outdoors and under what conditions.
Emergency Cooking
Heat Sources1. Outdoor only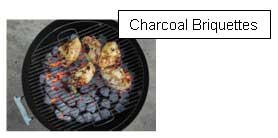
- 'Buddy Burners' (Wax filled cardboard Camp Fires in a can)
- Charcoal Briquettes
- Coleman® Fuel Stoves (Camping Stoves)
- Propane Gas Grills
Make your own 'buddy burner'
Materials: Plain corrugated cardboard, small flat
can, such as a tuna can (save the lid), a #10 can
(the large institutional size), and candle wax or paraffin.
Tools: punch-type can opener, and tin snips 
Procedure:
a. Cut the cardboard in strips whose width is the height of the can -- across the corrugations, so that the holes show. Roll the strips until the cardboard roll fits snugly into the can.
b. Melt the wax. It is best to use a double boiler, as if the wax gets too hot, it can burst into flame. You can improvise a double boiler by putting water in a large pan, and then setting a smaller pan into the water. Each tuna can will take about 4 ounces of wax.
c. When the wax is melted, slowly pour it into the buddy burner so that it runs down into the holes and saturates the corrugated cardboard and fill the can to the rim. You can put a small piece of cardboard sticking up or a candle wick in the middle to help start it, but this isn't required. Let it cool and harden. To light it, set it on a brick or concrete block. Put a lighted match in the middle of the can or light the wick. The flame will spread across the top of the can; that's OK, that's what it's supposed to do.
d. To use for cooking: Cut out one end of the #10 can. Use the tin snips to cut a 3" high and 4" wide "door" on one side of the can at the open end. Leave the top of the door uncut. Bend this flap of metal up so the door is "open". Take the punch-type can opener, and make 3 or 4 holes on the other side of the can at the top (this is your chimney). Light the tuna can as described above, and place the #10 can over the Buddy Burner and place a pan with whatever you want to cook on top of the #10 can. This "#10 can stove" can be adapted to fuels like twigs, charcoal or charcoal briquettes, but do not use these indoors.
WARNING for using any indoor alternate cooking ideas

- If used indoors, provide ventilation with a window or door open 1 inch. Place the cooking device close to this opening but not close to curtains or other flammable materials!
- Place all open flame emergency heaters on a fire-proof surface!
2. Indoor or Outdoor - Candles
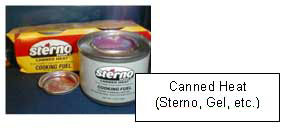
- Canned Heat (Sterno, Gel, EcoFuelXB or HeatCell, etc.) [EcoFuelXB doesn't evaporate over time, as Sterno does, so it has unlimited shelf life and is eco-friendly. It also goes by the name HeatCell. See Heat Cell™ and Ecofuel XB™.]
- Fondue Pots
3. Indoor, if used and installed properly - Fireplace
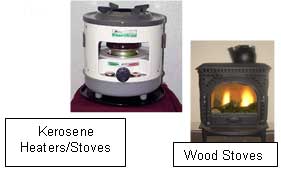
- Kerosene Heaters and Stoves
- Natural Gas Stoves and Ovens
- Propane Stoves & Ovens
- Wood Stoves
4. Solar Cooking - Solar Panel Cookers
- Solar Box Cookers
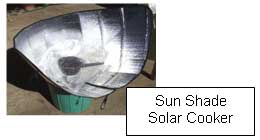
- Sun Shade Solar Cookers
 Make your own solar cooker
. See
The "Minimum" Solar Box Cooker.

Note: For an alternative lid, unscrew the door from a microwave and use it. Glass from a picture frame would work well, too, if it is the right size.
Cooking Techniques
When learning to cook over a woodstove, open fire, or any other new technique, begin by simply boiling water for instant soup, tea or coffee. This will give you a feel of how fast or slowly a pot will heat, without risking a fire or burning valuable food. After that, try making one pot of clear soup. Then progress to things like popcorn, pancakes, or items that are fried in small amounts of oil (such as bacon or sausage).
Do NOT try to deep fry anything on an open fire. Then, try baking muffins or breads.
1. To get the most cooking from the least fuel, use a pressure cooker. Make sure you get an extra gasket.
 2. Covered pans cook faster and save scarce fuel.
 - Cook with lids on pots.
- Cover cake pans and other open dishes with tin foil.
3. Make Your Own Non-Electric Crock-Pot
- Use a box or bucket big enough to pack 4 inches of insulating material on all sides, top and bottom.
- Line the inside with aluminum foil.
- Put insulating material on the bottom (newspapers, cloth, or sawdust).
- Using a 3-6 quart pot, bring food to boil and place in box or bucket.
- Put insulating material on sides and top of bucket and let 'cook' for up to 4 hours.